| A more fancy copy of this document with dark source code background is available at GIntro README |
This work is partly based on earlier works of J. Mansour and has been supported by A. Rumpf and other Nim and GTK/Gnome developers.
The combinatorics module was kindly provided by R. Behrends.
|
This repository contains bindings from the Nim programming language to the GTK3 GUI (Graphical User Interface) library and related libraries. (With some fixes it should also work for upcoming GTK4.)
Nim is a modern universal programming language.
GTK, also known as the Gimp Tool Kit and now sometimes called Gnome Tool Kit, is a Graphical User Interface library.
| Later we will insert at this location a nice picture of a fancy Nim GTK3 GUI. Such a picture is fine to attract users and indeed is a good motivation. But such pictures are no real evidence for the quality of a GUI toolkit — the concrete example may look nice, while the toolkit looks much worse in other environments and offers by far not all that what is needed in real life. |
While GTK was initially designed and advertised as cross platform GUI toolkit, it is currently mostly used on Linux and other Unix like operation systems. Most Linux distributions include it, and some use it for their default desktop environment, often with the Gnome environment or other window managers. While GTK2 applications like GIMP are still used on Windows, there seems to exist currently only very few GTK3 applications for Windows or MacOSX. When you develop primary free open source software (FOSS) for Linux or other Unix like operating systems, then GTK3 is a good choice for you. With some effort you should be even able to port your application to the proprietary Windows or MacOSX operating systems. But when your primary target platforms are Windows and MacOSX and you desire a real native look and feel there, then you may find better suited ones in the Nim software repository. Also, when you only need a minimal restricted GUI which is very easy to install on Windows and MacOSX, then you may find better suited packages in the Nim package repository. Android OS is currently not supported by GTK at all.
| At least for Windows 10 it seems to be not that hard to install GTK3 libraries, as was recently reported in https://github.com/StefanSalewski/gintro/issues/24 by user zetashift: |
  Sketch of GTK3 install for Windows 10:
  For the GTK libs I did according these instructions(https://www.gtk.org/download/windows.php):
  Install MSYS2
  In the msys2 cmd I entered:
  pacman -S mingw-w64-x86_64-gtk3
  Then for some other necessary depencies(girepository.dll) you need to do:
  pacman -S mingw-w64-x86_64-python3-gobject

  Additional, you have to install the separate GtkSourceView lib in a similar manner from
  https://github.com/Alexpux/MINGW-packages/blob/master/mingw-w64-gtksourceview3/
While low level Nim bindings for GTK3 are already available since a few years, this one is an attempt to provide real high level bindings with full type safety, full Garbage Collector (GC) support and an idiomatic Application Programming Interface (API).
Currently there are at least 3 sources of GTK3 bindings for Nim:
-
https://github.com/ngtk3 (obsolete, will be deleted)
ngtk3 was the first attempt to provide GTK3 support for Nim. It contains single repositories for all the GTK related libraries and is not supported by nimble package manager. It was created from GTK 3.20 headers and is now deprecated.
oldgtk3 is the port of ngtk3 to GTK 3.22 — joining all libraries and providing nimble support. Some people may still prefer using oldgtk3. As it is generated with the Nim tool c2nim directly from the C header files without much manual intervention, it should be complete and contain not that much bugs. Missing Garbage Collector support is generally not really a problem, as widgets are generally put into containers and were automatically deleted together with its parents due to GTK’s reference counting.
Still there can be some demand for really high level bindings — so this gintro repository tries to provide them.
High level GTK3 bindings, as available for many other programming languages like C++, Python, Ruby or D already, have these advantages:
-
full Garbage Collector or Destructor support — you should never have to free resources manually
-
Widgets are Nim objects, so inheritance and sub-classing can be used
-
full type safety — no needs for casts or other unsafe and dangerous operations
These high level bindings are based on GObject-Introspection, an XML based database like interface description. Compared to the C header files this description gives us more and deeper information about data types and function calls, for example ownership transfer of objects and in or out direction of procedure variables, which makes writing the glue code much easier. And it should work with minimal modifications also for the upcoming GTK4.
Unfortunately there are also some drawbacks:
-
The Application Programming Interface (API) will be different from what is known from C API, so using C examples or C tutorials is not really straight forward
-
The high level source code will differ from available C examples, so there would be a big demand for tutorials
-
We need a lot of glue code, which has much room for bugs. So much testing is necessary.
-
There is some overhead due to indirect calls, leading to some code size increase and minimal performance loss.
| The new package name is gintro, short for GObject-Introspection. The previous name was nim-gi, but the hyphen is deprecated for package names, as is the nim prefix. |
Current state of these bindings
We are still in an early stage, but it is already more than a proof of concept. GTK and related libraries have many thousand of
callable functions and nearly as many data types. Testing all that is nearly impossible for a small team with limited resources.
The initial approach was to generate low level
bindings, which looked similar to the ones generated by the c2nim tool from the C headers. After that was done, we have associated all
the C structs and GObject data types with Nim proxy objects. A well defined relation between these proxy object and the low level C data types
should ensure fully automatic garbage collection. This is supported by smart type conversion, for example C strings returned by glib library
are assigned to newly created Nim strings, while the memory of the C strings is automatically freed. For most cases this seems to work. But there
exists a few more complicated cases, for example functions may return whole arrays of C strings or other non elementary data types,
or function arguments or results may be so called glists,
list structures of glib library. These cases can not be processed automatically but needs carefully manual investigations. And there may be still functions and data
types missing: GObject-Introspection query gives us many thousand lines of Nim interface code, and it is not really obvious if and what is missing.
Some functions and data types are missing for sure — at least some low level ones, which are considered unneeded for high level bindings by GObject-Introspection.
But maybe more is missing, we have to investigate that. Until now these bindings have been tested only for 64 bit Linux systems with GTK 3.22.
These basic libraries are already partly tested:
Gtk, Gdk, GLib, GObject, Gio, GdkPixbuf, GtkSource, Pango, PangoCairo, PangoFT2, GModule, Rsvg, fontconfig, freetype2, xlib, Atk, Vte, cairo
In best case it should be possible to add more GObject based libraries to this list without larger modifications of the generator source code. Unfortunately the bindings for the cairo drawing library provided by GObject-Introspection was only a minimal stub — we have extend it manually.
How to try it out
Of course you will need a working Nim installation with a recent compiler version and you have to ensure that GTK and related libraries are installed on your system. For some Linux distributions which provide mainly pre-compiled software you may have to also install some GTK related developer files.
With a recent nimble version (>= v0.8.10) you only have to type in a shell window:
nimble install gintro
| Latest version of gintro package uses some files from oldgtk3 package for bootstrapping. We assume that users of gintro generally are not interested in low level oldgtk3 package, so we try to download only 3 single files from oldgtk3 package. That should work if wget or nimgrab executables are available. If it fails you should get a longer error message which may help you to solve the issue. |
Nimble prepare should run for about 20 seconds, it compiles and executes the generator program gen.nim.
Unfortunately we can not guarantee that the generator command will be able to really build all the
desired modules. The built process highly depends on your OS and installed GTK version. For 64 bit Linux systems
with GTK 3.22 and all required dependencies installed it should work. For never GTK versions it may fail, when that GTK
release introduces for example new unknown data types like array containers. In that case manual fixes may be necessary.
The GObject-Introspection based built process generates bindings customized to the OS where the generator is executed,
so for older GTK releases or a 32 bit system different files are created. Later we may also provide pre-generated
files for various OS and GTK versions, but building locally is preferred when possible.
|
A few basic examples
| Currently we do not install the example programs. If you want to try them, you have to copy the source code of the examples from https://github.com/StefanSalewski/gintro/tree/master/examples to your local computer, maybe to /tmp/gintro/examples directory. |
Then you can compile and run them from shell with commands like
cd /tmp/gintro/examples/
nim c app0.nim
./app0
or you may open the source files in your favorite Nim IDE or editor. Taking the source code from this Readme file is not really recommended, as these source code listings may be not the latest versions.
GTK3 programs can use still the old GTK2 design, where you first initialize the GTK library, create your widgets and finally enter the GTK main loop. This style is still used in many tutorials as in Zetcode tutorial or in the GTK book of A. Krause. Or you can use the new GTK3 App style, this is generally recommended by newer original GTK documentation. Unfortunately the GTK3 original documentation is mostly restricted to the GTK3 API documentation, which is generally very good, but makes it not really easy for beginners to start with GTK. API docs and some basic introduction is available here:
If you should decide to continue developing software with GTK, then you may consider installing the so called
devhelp tool. It gives you easy and fast access to the GTK API docs. For example, if you want to use a Button Widget in your
GUI and wants to learn more about related functions and signals, you just enter Button in that tool and are guided to
all the relevant information.
|
We start with a minimal traditional old style example, which should be familiar to most of us:
# nim c t0.nim
import gintro/[gtk, gobject]

proc bye(w: Window) =
  mainQuit()
  echo "Bye..."

proc main =
  gtk.init()
  let window = newWindow()
  window.title = "First Test"
  window.connect("destroy", bye)
  window.showAll
  gtk.main()

main()
This is the traditional layout of GTK2 programs. When using this style then it is important to initialize the GTK library by calling gtk.init()
at the very beginning. Then we create the desired widgets, connect signals, show all widgets and finally enter the GTK main loop
by calling gtk.main. About connecting signals we will learn more soon, for now it is only important that we have to connect to
the destroy signal here to enable the user to terminate program execution by clicking the window close button.
Now a really minimal but complete App style example, which displays an empty window.
| The source text of all these examples is contained in the examples directory. Unfortunately github seems to not allow to include that sources directly into this document, so there may be minimal differences between the source code displayed here and the sources in examples directory. |
# app0.nim -- minimal application style example
# nim c app0.nim
import gintro/[gtk, glib, gobject, gio]

proc appActivate(app: Application) =
  let window = newApplicationWindow(app)
  window.title = "GTK3 & Nim"
  window.defaultSize = (200, 200)
  showAll(window)

proc main =
  let app = newApplication("org.gtk.example")
  connect(app, "activate", appActivate)
  discard run(app)

main()
In the main proc we create a new application and connect the activate signal to our activate proc, which then creates and displays
the still empty window.
We are importing modules gtk and gio. Initially both modules had a data type called Application (gtk.Application
extends indeed the gio.Application), so we would have to use module name prefixes, or we could import from gio only
what is really needed (from gio import …) or use the form (import gio exept …). But as gio.Application is generally
not needed often, we have no renamed gio.Application to GApplication. No more name clashes.
|
Various ways to set widget parameters are supported — the number 1 to 6 refer to the comments below:
setDefaultSize(window, 200, 200) (1)
gtk.setDefaultSize(window, 200, 200) (2)
window.setDefaultSize(200, 200) (3)
window.setDefaultSize(width = 200, height = 200) (4)
window.defaultSize = (200, 200) (5)
window.defaultSize = (width: 200, height: 200) (6)| 1 | proc call syntax |
| 2 | optional qualified with module name prefix |
| 3 | method call syntax |
| 4 | named parameters |
| 5 | tupel assignment |
| 6 | tupel assignment with named members |
Well, that empty window is really not very interesting. The GTK and Gnome team provides some GTK examples at https://developer.gnome.org/gnome-devel-demos/. The C demos seems to be most actual and complete, and are easy to port to Nim. So we start with these, but if you are familiar with the other listed languages, then you can try to port them to Nim as well. Let us start with https://developer.gnome.org/gnome-devel-demos/3.22/button.c.html.en as it is still short and easy to understand, but shows already some interesting topics.
The C code looks like this:
Converting it to Nim is straight forward with some basic C and Nim knowledge, and Nim does not force us
to convert its shape into all the classes known from pure Object Orientated (OO) languages. We can either use the
Nim tool c2nim to help us with the conversion, or do it manually. Indeed c2nim can be very helpful by
converting C sources to Nim. Most of the time it works well. Personally I generally pre-process C files, for example
by removing too strange macros and defines, or by replacing strange constructs, like C `for loops, to simpler
ones like while loops. Then I apply c2nim to the C file and finally manually compare the result line by line and
fine tune the Nim code. But for this short source text we may do all that manually and finally get something like
this:
Again we have the basic shape already known from app0.nim example: Main proc creates the application, connect
to the activate signal and finally runs the application. When GTK launches the application and emits the activate signal, then
our activate proc is called, which creates a main window containing a button widget. That button is again connected with a
signal, in this case named clicked. That signal is emitted by GTK whenever that button is clicked with the mouse and results
in a call of our provided buttonClicked() proc. The procs connected to signals are called callbacks and generally got the widget
on which the signal was emitted as first parameter. They can also get a second optional parameter of arbitrary type — we will
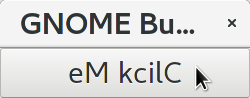
see that in a later example. This callback here gets only the button itself as parameter, and it’s task is to reverse the
text displayed by the button. Not very interesting basically, but we are indeed using the glib function utf8Strreverse()
for this task. While that function internally works with cstrings, and in C we have to free the memory of the returned cstring,
in our Nim example that is done automatically by Nim’s Garbage Collector. When you compare our example carefully with the C code,
then you may notice a difference. The C code passes the window containing the button as an additional parameter to the
callback function, but that parameter is not really used. We simple ignore it here, as it is not used at all.
In one of the following examples you will learn how passing (nearly) arbitrary parameters in a type safe way is done.
Another difference is, that the C code returns an integer status value returned by g_application_run() to the OS. We
could do the same by using the quit() proc of Nim’s OS module, but as that would give us no additional benefit, we simply ignore it.
The command nim c sourcetext.nim generates an executable which contains code for runtime checks and debugging,
which increases executable size and decreases performance.
After you have tested your software carefully, you may give the additional parameter -d:release to avoid this. For the gcc backend
you may additional enable Link Time Optimization (LTO), which reduces executable size further. To enable LTO you may put
a nim.cfg file in your sources directory with content like
|
path:"$projectdir"
nimcache:"/tmp/$projectdir"
gcc.options.speed = "-march=native -O3 -flto -fstrict-aliasing"
With that optimization, your executable sizes should be in the range of about 50 kB only!
Optional, type safe parameters for callbacks
The next example shows, how we can pass (nearly) arbitrary parameters to our connect procs.
We pass a string, an object from the stack, a reference to an object allocated on the heap
and finally a widget (in this case the application window itself, you may also try passing
another button). As the main window itself is a so called GTK bin and can contain only one
single child widget, we create a container widget, a vertical box in this case, fill that box with
some buttons, and add that box to the window.
Compile and start this example from the command line and watch what happens when you click on the buttons.
# nim c connect_args.nim
import gintro/[gtk, glib, gobject, gio]

type
  O = object
    i: int

proc b1Callback(button: Button; str: string) =
  echo str

proc b2Callback(button: Button; o: O) =
  echo "Value of field i in object o = ", o.i

proc b3Callback(button: Button; r: ref O) =
  echo "Value of field i in ref to object O = ", r.i

proc b4Callback(button: Button; w: ApplicationWindow) =
  if w.title == "Nim with GTK3":
    w.title = "GTK3 with Nim"
  else:
    w.title = "Nim with GTK3"

proc appActivate (app: Application) =
  var o: O
  var r: ref O
  new r
  o.i = 1234567
  r.i = 7654321
  let window = newApplicationWindow(app)
  let box = newBox(Orientation.vertical, 0)
  window.title = "Parameters for callbacks"
  let b1 = newButton("Nim with GTK3")
  let b2 = newButton("Passing an object from stack")
  let b3 = newButton("Passing an object from heap")
  let b4 = newButton("Passing a Widget")
  b1.connect("clicked",  b1Callback, "is much fun.")
  b2.connect("clicked",  b2Callback, o)
  b3.connect("clicked",  b3Callback, r)
  b4.connect("clicked",  b4Callback, window)
  box.add(b1)
  box.add(b2)
  box.add(b3)
  box.add(b4)
  window.add(box)
  window.showAll

proc main =
  let app = newApplication("org.gtk.example")
  connect(app, "activate", appActivate)
  discard app.run

main()
To prove type safety, we may modify one of the callback procs and watch the compiler output:
proc b1Callback(button: Button; str: int) =
  discard # echo str
connect_args.nim(37, 5) template/generic instantiation from here gtk.nim(-15021, 10) Error: type mismatch: got (ref Button:ObjectType, string) but expected one of: proc b1Callback(button: Button; str: int)
It may be not always really obvious what the compiler wants to tell us, but at least we are told that it got a string and expected an int.
Currently the connect function is realized by a Nim type safe macro. Connect accepts two or three
arguments — the widget, the signal name and the optional argument. When the optional argument
is a ref (reference to objects on the heap) then it is passed as a reference, otherwise a deep copy
of the argument is passed. For the above code this means, that r and the window variables are passed
as references, while the string and the stack object are deep copied. Currently it is not possible
to release the memory of passed arguments again. This should be no real problem, as in most
cases no arguments are passed at all, and when arguments are passed, then they are general
small in size like plain numbers or strings, or maybe references to widgets which could not be freed
at all, as they are part of the GUI. Later we may add more variants of that connect macro.
Navigation can be hard for beginners. You may have basic knowledge of GTK and want
to build a GUI for your application. But how to find what you need. Well, we offer no separate
automatically generated API documentation currently, as that is not really helpful. In most cases
it is easy to just guess Nim symbol names, proc parameters and all that. Using a smart editor
with good nimsuggest support further supports navigation — for example NEd shows us
all the needed proc parameters when we move the cursor on a proc name, or we press Ctrl+W and jump
to the definition of that symbol. For unknown stuff the original C function name is often a good starting point.
Assume you don’t know much about GTK’s buttons, but you know that you want to have a button in
your GUI application. GTK generally offers generator functions containing the string new in their name.
So it is easy to guess that there exists a C function named gtk_button_new. That name is also
contained in the bindings files, in this case in gtk.nim. So we open that file in a text editor and search for
that term. So it is really easy to find first starting points for related procs and data types. Most data types
are located near by their related functions, so you should be able to find all relevant information fast.
Remember the GTK devhelp tool, and use also grep or the nimgrep variant.
|
Extending or sub-classing Widgets
I may occur that we want to attach additional information to GTK widgets by extending or subclassing them. Doing this is supported by providing for each widget class not only a corresponding new() proc which returns the newly created widget, but also a init() proc, which gets an uninitialized variable of the (extended) widget type as argument and initializes that variable with a newly created GTK widget . Initializing the added fields is done separately by the user. The following code shows a GTK button, which is extended with a counter member field. That counter is decreased for each button click. The amount of decrease (5) is passed to the callback as a int parameter.
In this example we have to define our new widget type first, then we have to declare a variable of that type and pass that variable to the init() proc.
CSS styles, GErrors and Exceptions
Often GTK beginners ask how one can apply custom styles to GTK widgets, for example custom colors. While in most cases the use of custom colors gives just ugly results, as the custom colors generally do not match well with the default color scheme, it is good to know how we can do it. For GTK3 styles are applied to widgets by using Cascading Style Sheets (CSS). You may find C example code similar to this:
// https://stackoverflow.com/questions/30791670/how-to-style-a-gtklabel-with-css
// gcc `pkg-config gtk+-3.0 --cflags` test.c -o test `pkg-config --libs gtk+-3.0`
#include <gtk/gtk.h>
int main(int argc, char *argv[]) {
    gtk_init(&argc, &argv);
    GtkWidget *window = gtk_window_new(GTK_WINDOW_TOPLEVEL);
    GtkWidget *label = gtk_label_new("Label");
    GtkCssProvider *cssProvider = gtk_css_provider_new();
    char *data = "label {color: green;}";
    gtk_css_provider_load_from_data(cssProvider, data, -1, NULL);
    gtk_style_context_add_provider(gtk_widget_get_style_context(window),
                                   GTK_STYLE_PROVIDER(cssProvider),
                                   GTK_STYLE_PROVIDER_PRIORITY_USER);
    g_signal_connect(window, "destroy", G_CALLBACK(gtk_main_quit), NULL);
    gtk_container_add(GTK_CONTAINER(window), label);
    gtk_widget_show_all(window);
    gtk_main();
}
Converting that to Nim is again straight forward:
# nim c label.nim
import gintro/[gtk, glib, gobject, gio]
proc appActivate(app: Application) =
let window = newApplicationWindow(app)
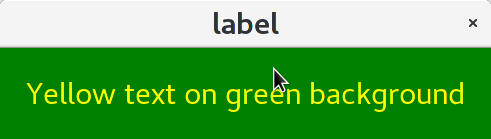
let label = newLabel("Yellow text on green background")
let cssProvider = newCssProvider()
let data = "label {color: yellow; background: green;}"
#discard cssProvider.loadFromPath("doesnotexist")
discard cssProvider.loadFromData(data)
let styleContext = label.getStyleContext
assert styleContext != nil
addProvider(styleContext, cssProvider, STYLE_PROVIDER_PRIORITY_USER)
window.add(label)
showAll(window)
proc main =
let app = newApplication("org.gtk.example")
connect(app, "activate", appActivate)
discard run(app)
main()For this example we create a plain label widget with some text. To colorize it, we generate a CssProvider and load it with a textual description of our desired colors. Then we extract the style context from the label and add our CssProvider to it.
The last parameter of the C function gtk_css_provider_load_from_data() is of type GError and can
be used in C code to detect runtime errors. The C code above just passes NULL to ignore this error.
For Nim we map that GError argument to exceptions. To test what happens in Nim when an GError would
report an error condition, you may uncomment function loadFromPath() in the code above. As the specified path
does not exist, we should get an exception with a message telling us the problem. Of course in your real
code you may catch such exceptions with Nim’s try: blocks. (You may also modify the data variable above to
an illegal CSS statement — if the statement is seriously wrong, then you should get an exception from
loadFromData().
GTK Builder — user interfaces created with the glade tool
As C code can be very verbose, some people prefer outsourcing the GUI layout in XML files which can be created and modified with the glade GUI creator program. For high level languages like Python or Nim the program source code is generally short and clean, so that use of XML files may not have much benefit. But of course we can use GTK builder from Nim. We follow the example from https://developer.gnome.org/gtk3/stable/ch01s03.html but we modify it to use the new GTK3 app style: For the XML file we have to change only class="GtkWindow" into class="GtkApplicationWindow". Our Nim program has the well known application shape, with one addition: We have to explicitly set the application for the main window. Of course you can also use the traditional program structure with Nim and Builder, for that case you can straight follow the linked page or other examples. Here is the XML file and the Nim code:
<interface>
  <object id="window" class="GtkApplicationWindow">
    <property name="visible">True</property>
    <property name="title">Grid</property>
    <property name="border-width">10</property>
    <child>
      <object id="grid" class="GtkGrid">
        <property name="visible">True</property>
        <child>
          <object id="button1" class="GtkButton">
            <property name="visible">True</property>
            <property name="label">Button 1</property>
          </object>
          <packing>
            <property name="left-attach">0</property>
            <property name="top-attach">0</property>
          </packing>
        </child>
        <child>
          <object id="button2" class="GtkButton">
            <property name="visible">True</property>
            <property name="label">Button 2</property>
          </object>
          <packing>
            <property name="left-attach">1</property>
            <property name="top-attach">0</property>
          </packing>
        </child>
        <child>
          <object id="quit" class="GtkButton">
            <property name="visible">True</property>
            <property name="label">Quit</property>
          </object>
          <packing>
            <property name="left-attach">0</property>
            <property name="top-attach">1</property>
            <property name="width">2</property>
          </packing>
        </child>
      </object>
      <packing>
      </packing>
    </child>
  </object>
</interface> https://developer.gnome.org/gtk3/stable/ch01s03.html
# builder.nim -- application style example using builder/glade xml file for user interface
# nim c builder.nim
import gintro/[gtk, glib, gobject, gio]
proc hello(b: Button; msg: string) =
echo "Hello", msg
proc quitApp(b: Button; app: Application) =
echo "Bye"
quit(app)
proc appActivate(app: Application) =
let builder = newBuilder()
discard builder.addFromFile("builder.ui")
let window = builder.getApplicationWindow("window")
window.setApplication(app)
var button = builder.getButton("button1")
button.connect("clicked", hello, "")
button = builder.getButton("button2")
button.connect("clicked", hello, " again...")
button = builder.getButton("quit")
button.connect("clicked", quitApp, app)
#showAll(window)
proc main =
let app = newApplication("org.gtk.example")
connect(app, "activate", appActivate)
discard run(app)
main()For each builder component gintro provides a typesafe access proc like getApplicationWindow() and getButton() in this example.
Generally it is possible to use resource files merged with the executable program instead of an external XML files, we have to investigate how we can do that in Nim. And it may be possible to connect the signal handlers to handler procs from within the XML file — this is also work in progress…
Drawing with Cairo graphics library
The next example shows how we can use the cairo graphics library for drawing on a DrawingArea widget, and at the same time uses glib timeoutAdd() function to create a timer which periodically calls the drawing function to create some animations. The code is based on a recent post to the cairo mailing list and shows a sine wave which is continuously moving to the left.
| The gobject-introspection generated cairo module was only a minimal stub, because cairo library does not really support introspection. Now we are using a cairo module which is generated directly from the cairo C header files with the tool c2nim and then modified to support a high level API. |
# https://lists.cairographics.org/archives/cairo/2016-October/027791.html
# Nim version of that plain cairo animation example

import gintro/[gtk, glib, gobject, gio, cairo]
import math

const
  NumPoints = 1000
  Period = 100.0

proc invalidateCb(w: Widget): bool =
  queueDraw(w)
  return SOURCE_CONTINUE

proc sineToPoint(x, width, height: int): float =
  math.sin(x.float * math.TAU / Period) * height.float * 0.5 + height.float * 0.5

proc drawingAreaDrawCb(widget: DrawingArea; context: Context): bool =
  var redrawNumber {.global.} : int
  let width = getAllocatedWidth(widget)
  let height = getAllocatedHeight(widget)
  for i in 1 ..< NumPoints:
    context.lineTo(i.float , sineToPoint(i + redrawNumber, width, height))
  context.stroke
  inc(redrawNumber)
  return true # TRUE to stop other handlers from being invoked for the event. FALSE to propagate the event further.

proc appActivate(app: Application) =
  let window = newApplicationWindow(app)
  window.title = "Drawing example"
  window.defaultSize = (400, 400)
  let drawingArea = newDrawingArea()
  window.add(drawingArea)
  showAll(window)
  discard timeoutAdd(1000 div 60, invalidateCb, drawingArea)
  connect(drawingArea, "draw", drawingAreaDrawCb)

proc main =
  let app = newApplication("org.gtk.example")
  connect(app, "activate", appActivate)
  discard run(app)

main()
A simple ListView example
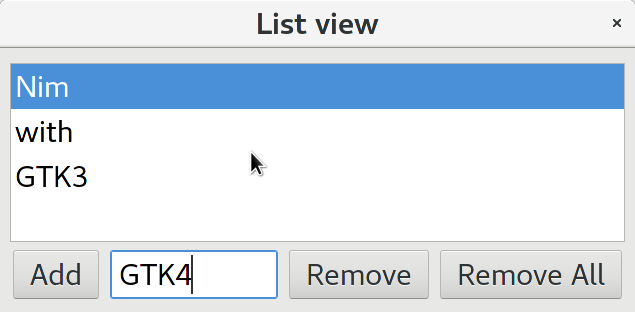
Recently someone reported about some problems porting a GTK2 application to Nim GTK3, so I will give a small example which may help using ListViews and TreeViews. These two widget types are the most complicated widget types in GTK — I can remember that I had some trouble myself when I used Ruby-GTK some years ago. As I can currently not remember details about use of ListView widgets, I decided to take an example code from zetcode.com as starting point. Of course porting is straight forward, but when I tried to compile the result I noticed some bugs and restrictions of current gintro package. Of course not really surprising, as the package is not really tested yet. I will try to fix these bugs later. First problem is, that we store a ListStore as model in our TreeView, and we need to extract that ListStore from the TreeView for some operations. But module gtk.nim offers currently only a function to extract the model itself, which is of type TreeModel. In the C code an upcast is used to get the ListStore from the retrieved TreeModel. To avoid casting in our Nim code, I have just copied the getModel() proc and modified it to return a ListStore. Second problem was, that module gio export a ListStore datatype also. To avoid prefixing all ListStore types with gtk prefix, I excluded gio.ListStore from import list. And finally a real bug: Proc newListStore() expects currently a plain pointer as last parameter, while we know that it should be the address of a list of GTypes. So we have to use an ugly cast for now. For populating the ListStore currently GValues are used. That is not very convenient, and for that we need the correct GType of our string list. In C one would use the macro G_TYPE_STRING, which is not provided by gobject-introspection. So we use typeFromName() to get the correct GType, which works fine when we know that the string name is "gchararray". Later we will provide a higher level function for this process.
I will try to give more and better explained ListView and TreeView examples later…
# http://zetcode.com/gui/gtk2/gtktreeview/
# dynamiclistview.c

import gintro/[glib, gobject, gtk]
import gintro/gio except ListStore

const
  LIST_ITEM = 0
  N_COLUMNS = 1

var list: TreeView

# this is copied from gtk.nim
#proc getModel*(self: TreeView): TreeModel =
#  new(result)
#  result.impl = gtk_tree_view_get_model(cast[ptr TreeView00](self.impl))

proc getListStore(self: TreeView): ListStore =
  new(result)
  result.impl = gtk_tree_view_get_model(cast[ptr TreeView00](self.impl))

proc appendItem(widget: Button; entry: Entry) =
  var
    val: Value
    iter: TreeIter
  let store = getListStore(list)
  let gtype = typeFromName("gchararray")
  discard gValueInit(val, gtype)
  gValueSetString(val, entry.text)
  store.append(iter)
  store.setValue(iter, LIST_ITEM, val)
  entry.text = ""

proc removeItem(widget: Button; selection: TreeSelection) =
  var
    ls: ListStore
    iter: TreeIter
  let store = getListStore(list)
  if not store.getIterFirst(iter):
      return
  if getSelected(selection, ls, iter):
    discard store.remove(iter)

proc onRemoveAll(widget: Button; selection: TreeSelection) =
  var
    iter: TreeIter
  let store = getListStore(list)
  if not store.getIterFirst(iter):
    return
  clear(store)

proc initList(list: TreeView) =
  let renderer = newCellRendererText()
  let column = newTreeViewColumn()
  column.title = "List Item"
  column.packStart(renderer, true)
  column.addAttribute(renderer, "text", LIST_ITEM)
  discard list.appendColumn(column)
  let gtype = typeFromName("gchararray")
  let store = newListStore(N_COLUMNS, cast[pointer]( unsafeaddr gtype)) # cast due to bug in gtk.nim
  list.setModel(store)

proc appActivate(app: Application) =
  let
    window = newApplicationWindow(app)
    sw = newScrolledWindow()
    hbox = newBox(Orientation.horizontal, 5)
    vbox = newBox(Orientation.vertical, 0)
    add = newButton("Add")
    remove = newButton("Remove")
    removeAll = newButton("Remove All")
    entry = newEntry()
  window. title = "List view"
  window.position = WindowPosition.center
  window.borderWidth = 10
  window.setSizeRequest(370, 270)
  list = newTreeView()
  sw.add(list)
  sw.setPolicy(PolicyType.automatic, PolicyType.automatic)
  sw.setShadowType(ShadowType.etchedIn)
  list.setHeadersVisible(false)
  vbox.packStart(sw, true, true, 5)
  entry.setSizeRequest(120, -1)
  hbox.packStart(add, false, true, 3)
  hbox.packStart(entry, false, true, 3)
  hbox.packStart(remove, false, true, 3)
  hbox.packStart(removeAll, false, true, 3)
  vbox.packStart(hbox, false, true, 3)
  window.add(vbox)
  initList(list)
  let selection = getSelection(list)
  connect(add, "clicked", listview.appendItem, entry)
  connect(remove, "clicked", listview.removeItem, selection)
  connect(removeAll, "clicked", listview.onRemoveAll, selection)
  showAll(window)

proc main =
  let app = newApplication("org.gtk.example")
  connect(app, "activate", appActivate)
  discard run(app)

main()
A more advanced example for cairo drawing with zooming, panning, scrolling
The following code is a plain Nim version of a drawing demo which I wrote some years ago in Ruby (http://ssalewski.de/PetEd-Demo.html.en). With the latest fix to Nim GTK3 bindings it seems to work fine, but some rewriting for optimized performance may be needed, I have to investigate that. Cairo surface is currently manually freed, because GC may have a too large delay.
You can resize the window and zoom in with the mouse wheel. When zoomed in scroll bars appear. You can hold the middle mouse button pressed while moving the mouse for panning, and you can press left mouse button and move the mouse to first draw a selection rectangle and zoom into it when releasing the mouse button.
# Plain demo for zooming, panning, scrolling with GTK DrawingArea
# (c) S. Salewski, 21-DEC-2010 (initial Ruby version)
# Nim version April 2019
# License MIT

# This version of the demo program uses a separate proc paint()
# which allocates a custom surface for buffered drawing.
# That may be not really necessary, for simple drawings doing all
# the drawing in the "draw" call back is easier and faster. But for
# more complicated drawing operations, for example when using a
# background grid, which is a bit larger than the window size and
# is reused when scrolling, a custom surface may be useful.
# And finally that custom surface and custom cairo context is an
# important test for the language bindings.

import gintro/[gtk, gdk, glib, gobject, gio, cairo]

const
  ZoomFactorMouseWheel = 1.1
  ZoomFactorSelectMax = 10 # ignore zooming in tiny selection
  ZoomNearMousepointer = true # mouse wheel zooming -- to mouse-pointer or center
  SelectRectCol = [0.0, 0, 1, 0.5] # blue with transparency

discard """
Zooming, scrolling, panning...

|-------------------------|
|<-------- A ------------>|
|                         |
|  |---------------|      |
|  | <---- a ----->|      |
|  |    visible    |      |
|  |---------------|      |
|                         |
|                         |
|-------------------------|

a is the visible, zoomed in area == darea.allocatedWidth
A is the total data range
A/a == userZoom >= 1
For horizontal adjustment we use
hadjustment.setUpper(darea.allocatedWidth * userZoom) == A
hadjustment.setPageSize(darea.allocatedWidth) == a
So hadjustment.value == left side of visible area

Initially, we set userZoom = 1, scale our data to fit into darea.allocatedWidth
and translate the origin of our data to (0, 0)

Zooming: Mouse wheel or selecting a rectangle with left mouse button pressed
Scrolling: Scrollbars
Panning: Moving mouse while middle mouse button pressed
"""

# drawing area and scroll bars in 2x2 table (PDA == Plain Drawing Area)

type
  PosAdj = ref object of Adjustment
    handlerID: uint64

proc newPosAdj: PosAdj =
  initAdjustment(result, 0, 0, 1, 1, 10, 1)

type
  PDA_Data* = object
    draw*: proc (cr: Context)
    extents*: proc (): tuple[x, y, w, h: float]
    windowSize*: tuple[w, h: int]

type
  PDA = ref object of Grid
    zoomNearMousepointer: bool
    selecting: bool
    userZoom: float
    surf: Surface
    darea: DrawingArea
    hadjustment: PosAdj
    vadjustment: PosAdj
    hscrollbar: Scrollbar
    vscrollbar: Scrollbar
    fullScale: float
    dataX: float
    dataY: float
    dataWidth: float
    dataHeight: float
    lastButtonDownPosX: float
    lastButtonDownPosY: float
    lastMousePosX: float
    lastMousePosY: float
    zoomRectX1: float
    zoomRectY1: float
    drawWorld: proc (cr: Context)
    extents: proc (): tuple[x, y, w, h: float]

proc drawingAreaDrawCb(darea: DrawingArea; cr: Context; this: PDA): bool =
  if this.surf.isNil: return
  cr.setSource(patternCreateForSurface(this.surf))
  cr.paint
  if this.selecting:
    cr.rectangle(this.lastButtonDownPosX, this.lastButtonDownPosY,
                 this.zoomRectX1 - this.lastButtonDownPosX,
                     this.zoomRectY1 - this.lastButtonDownPosY)
    cr.setSource(0, 0, 1, 0.5) # SELECT_RECT_COL) # 0, 0, 1, 0.5
    cr.fillPreserve
    cr.setSource(0, 0, 0)
    cr.setLineWidth(2)
    cr.stroke
  return SignalEventStopPropagation
  #return true # TRUE to stop other handlers from being invoked for the event. FALSE to propagate the event further.

# clamp to correct values, 0 <= value <= (adj.upper - adj.pageSize), block calling onAdjustmentEvent()
proc updateVal(adj: PosAdj; d: float) =
  adj.signalHandlerBlock(adj.handlerID)
  adj.setValue(max(0.0, min(adj.value + d, adj.upper - adj.pageSize)))
  adj.signalHandlerUnblock(adj.handlerID)

proc updateAdjustments(this: PDA; dx, dy: float) =
  this.hadjustment.setUpper(this.darea.allocatedWidth.float * this.userZoom)
  this.vadjustment.setUpper(this.darea.allocatedHeight.float * this.userZoom)
  this.hadjustment.setPageSize(this.darea.allocatedWidth.float)
  this.vadjustment.setPageSize(this.darea.allocatedHeight.float)
  updateVal(this.hadjustment, dx)
  updateVal(this.vadjustment, dy)

# maybe for optimization we should only allocate a new surface when its size has changed.
proc paint(this: PDA) =
  if this.surf != nil:
    destroy(this.surf) # manually destroy surface -- GC would do it for us, but GC is slow...
  this.surf = this.darea.window.createSimilarSurface(Content.color,
      this.darea.allocatedWidth, this.darea.allocatedHeight)
  let cr = newContext(this.surf)
  cr.translate(this.hadjustment.upper * 0.5 - this.hadjustment.value, # our origin is the center
    this.vadjustment.upper * 0.5 - this.vadjustment.value)
  cr.scale(this.fullScale * this.userZoom, this.fullScale * this.userZoom)
  cr.translate(-this.dataX - this.dataWidth * 0.5, -this.dataY - this.dataHeight * 0.5)
  this.drawWorld(cr)          # call the user provided drawing function
  destroy(cr) # we can also manually destroy the context here, but GC would do it for us

proc dareaConfigureCallback(darea: DrawingArea; event: EventConfigure; this: PDA): bool =
  this.updateAdjustments(0, 0)
  (this.dataX, this.dataY, this.dataWidth,
    this.dataHeight) = this.extents() # query user defined size
  this.fullScale = min(this.darea.allocatedWidth.float / this.dataWidth,
      this.darea.allocatedHeight.float / this.dataHeight)
  this.paint

proc updateAdjustmentsAndPaint(this: PDA; dx, dy: float) =
  this.updateAdjustments(dx, dy)
  this.paint
  this.darea.queueDrawArea(0, 0, this.darea.allocatedWidth, this.darea.allocatedHeight)

# event coordinates to user space
proc getUserCoordinates(this: PDA; eventX, eventY: float): (float, float) =
  ((eventX - this.hadjustment.upper * 0.5 + this.hadjustment.value) / (
      this.fullScale * this.userZoom) + this.dataX + this.dataWidth * 0.5,
   (eventY - this.vadjustment.upper * 0.5 + this.vadjustment.value) / (
       this.fullScale * this.userZoom) + this.dataY + this.dataHeight * 0.5)

proc onMotion(darea: DrawingArea; event: EventMotion; this: PDA): bool =
  let state = getState(event)
  let (x, y) = event.getCoords
  if (state.contains(button1)): # selecting
    this.selecting = true
    this.zoomRectX1 = x
    this.zoomRectY1 = y
    this.darea.queueDrawArea(0, 0, this.darea.allocatedWidth, this.darea.allocatedHeight)
  elif button2 in state: # panning
    this.updateAdjustmentsAndPaint(this.lastMousePosX - x, this.lastMousePosY - y)
  this.lastMousePosX = x
  this.lastMousePosY = y
  #event.request # request more motion events ?

# zooming with mouse wheel -- data near mouse pointer should not move if possible!
# hadjustment.value + event.x is the position in our zoomed_in world, (userZoom / z0 - 1)
# is the relative movement caused by zooming
proc scrollEvent(darea: DrawingArea; event: EventScroll; this: PDA): bool =
  let z0 = this.userZoom
  var d = getScrollDirection(event)
  var (x, y) = event.getCoords
  if d == ScrollDirection.up:
    this.userZoom *= ZoomFactorMouseWheel
  elif d == ScrollDirection.down:
    this.userZoom /= ZoomFactorMouseWheel
    if (this.userZoom < 1):
      this.userZoom = 1
  if this.zoomNearMousepointer:
    this.updateAdjustmentsAndPaint((this.hadjustment.value + x) * (this.userZoom / z0 - 1),
                                 (this.vadjustment.value + y) * (this.userZoom / z0 - 1))
  else: # zoom to center
    this.updateAdjustmentsAndPaint((this.hadjustment.value +
        this.darea.allocatedWidth.float * 0.5) * (this.userZoom / z0 - 1),
        (this.vadjustment.value + this.darea.allocatedHeight.float * 0.5) * (this.userZoom / z0 - 1))

proc buttonPressEvent(darea: DrawingArea; event: EventButton; this: PDA): bool =
  var (x, y) = event.getCoords
  this.lastMousePosX = x
  this.lastMousePosY = y
  this.lastButtonDownPosX = x
  this.lastButtonDownPosY = y
  echo "buttonPressEvent", x, " ", y
  (x, y) = this.getUserCoordinates(x, y)
  echo "User coordinates: ", x, ' ', y, "\n" # to verify getUserCoordinates()

# zoom into selected rectangle and center it
proc buttonReleaseEvent(darea: DrawingArea; event: EventButton; this: PDA): bool =
  var (x, y) = event.getCoords
  var b = getButton(event)
  if b == 1:
    this.selecting = false
    let z1 = min(this.darea.allocatedWidth.float / (
        this.lastButtonDownPosX - x).abs, this.darea.allocatedHeight.float / (
        this.lastButtonDownPosY - y).abs)
    if z1 < ZoomFactorSelectMax: # else selection rectangle will persist, we may output a message...
      this.userZoom *= z1
      this.updateAdjustmentsAndPaint(
        ((2 * this.hadjustment.value + x + this.lastButtonDownPosX) * z1 -
            this.darea.allocatedWidth.float) * 0.5 - this.hadjustment.value,
        ((2 * this.vadjustment.value + y + this.lastButtonDownPosY) * z1 -
            this.darea.allocatedHeight.float) * 0.5 - this.vadjustment.value)

proc onAdjustmentEvent(this: PosAdj; pda: PDA) =
  pda.paint
  pda.darea.queueDrawArea(0, 0, pda.darea.allocatedWidth, pda.darea.allocatedHeight)

proc newPDA: PDA =
  initGrid(result)
  result.zoomNearMousepointer = ZoomNearMousepointer # mouse wheel zooming
  result.userZoom = 1.0
  result.darea = newDrawingArea()
  result.darea.setHExpand
  result.darea.setVExpand
  result.darea.connect("draw", drawingAreaDrawCb, result)
  result.darea.connect("configure-event", dareaConfigureCallback, result)
  result.darea.addEvents({EventFlag.buttonPress, EventFlag.buttonRelease,
      EventFlag.scroll, button1Motion, button2Motion, pointerMotionHint})
  result.darea.connect("motion-notify-event", onMotion, result)
  result.darea.connect("scroll_event", scrollEvent, result)
  result.darea.connect("button_press_event", buttonPressEvent, result)
  result.darea.connect("button_release_event", buttonReleaseEvent, result)
  result.hadjustment = newPosAdj()
  result.hadjustment.handlerID = result.hadjustment.connect("value-changed",
      onAdjustmentEvent, result)
  result.vadjustment = newPosAdj()
  result.vadjustment.handlerID = result.vadjustment.connect("value-changed",
      onAdjustmentEvent, result)
  result.hscrollbar = newScrollbar(Orientation.horizontal, result.hadjustment)
  result.vscrollbar = newScrollbar(Orientation.vertical, result.vadjustment)
  result.hscrollbar.setHExpand
  result.vscrollbar.setVExpand
  result.attach(result.darea, 0, 0, 1, 1)
  result.attach(result.vscrollbar, 1, 0, 1, 1)
  result.attach(result.hscrollbar, 0, 1, 1, 1)

proc appActivate(app: Application; initData: ref PDA_Data) =
  let window = newApplicationWindow(app)
  window.title = "Drawing example"
  window.defaultSize = (initData.windowSize[0], initData.windowSize[1])
  let pda = newPDA()
  pda.drawWorld = initData.draw
  pda.extents = initData.extents
  window.add(pda)
  showAll(window)

proc newDisplay*(initData: PDA_Data) =
  let app = newApplication("org.gtk.example")
  var d = new (ref PDA_Data)
  d[] = initData
  connect(app, "activate", appActivate, d)
  discard run(app)

when isMainModule:

  const                       # arbitrary locations for our data
    DataX = 150.0
    DataY = 250.0
    DataWidth = 200.0
    DataHeight = 120.0

  # we need two user defined functions -- one gives the extent of the graphics,
  # and the other does the cairo drawing using a cairo context.

  # bounding box of user data -- x, y, w, h -- top left corner, width, height
  proc worldExtents(): (float, float, float, float) =
    (DataX, DataY, DataWidth, DataHeight) # current extents of our user world

  # draw to cairo context
  proc drawWorld(cr: cairo.Context) =
    cr.setSource(1, 1, 1)
    cr.paint
    cr.setSource(0, 0, 0)
    cr.setLineWidth(2)
    var i = 0.0
    while true:
      if min(DataWidth - 2.0 * i, DataHeight - 2.0 * i) <= 0:
        break
      cr.rectangle(DataX + i, DataY + i, DataWidth - 2 * i, DataHeight - 2 * i)
      i += 10.0
    cr.stroke

  proc test =
    var data: PDA_Data
    data.draw = drawWorld
    data.extents = worldExtents
    data.windowSize = (800, 600)
    newDisplay(data)

  test()
We can use this module as a library easily and get this simple drawing tool with full zoom and scroll support:
import gintro/cairo
import drawingarea
from math import PI

proc extents(): (float, float, float, float) =
  (0.0, 0.0, 100.0, 100.0) # ugly float literals

# draw to cairo context
proc draw(cr: cairo.Context) =
  cr.setSource(1, 1, 1) # set background color and paint
  cr.paint
  cr.setSource(0, 0, 0) # forground color
  cr.arc(20, 30, 10, 0, 5) # nearly a circle
  cr.newSubPath # do not join the two arcs
  cr.arc(70, 60, 20, 0, math.PI)
  cr.stroke # finally do it

proc main =
  var data: PDA_Data
  data.draw = draw
  data.extents = extents
  data.windowSize = (800, 600)
  newDisplay(data)

main()| Related work: https://github.com/jdmansour/nim-smartgi |